How to Transform JPG Images into Embroidery Files Like a Pro
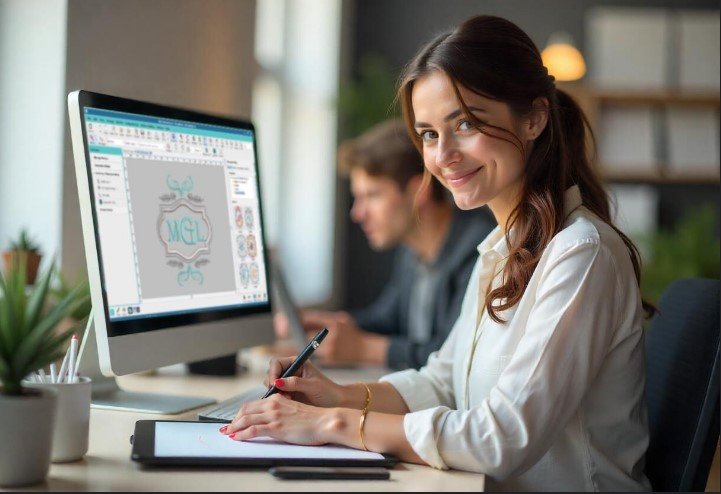
Embroidery is more than placing fabric under a machine and pressing a button. Every great design starts with careful planning. If you want clean stitches, smooth lines, and a professional finish, the first step is creating the right embroidery file. A simple JPG image cannot be stitched until it is prepared the right way.
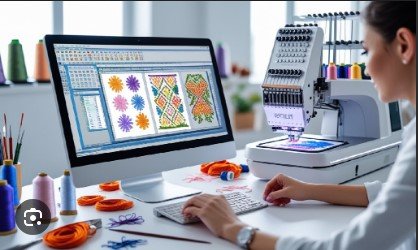
Many people believe they can upload a picture straight into an embroidery machine. Sadly, it does not work that way. You must first Transform JPG images into Embroidery Files through a process called embroidery digitizing. This process changes a picture into a stitch file that tells the machine where to sew, what stitch type to use, and how every part of the design should look on fabric.
Good digitizing makes a huge difference. It helps reduce thread breaks, keeps the fabric smooth, and creates sharp details that stand out. Whether you are making custom shirts, hats, patches, or gifts, a high-quality embroidery file is the key to beautiful results.
In this guide, you will learn how professionals convert JPG images into embroidery files, why the process matters, and what steps help produce clean and long-lasting embroidery.
What Is an Embroidery File?
An embroidery file is not the same as a picture.
A JPG image is made from pixels. These tiny dots create the picture you see on your screen.
An embroidery file is made from stitch data. It tells the embroidery machine exactly how to sew the design.
The file includes:
- Stitch types
- Stitch direction
- Stitch order
- Thread colors
- Stitch density
- Start and stop points
Without this information, an embroidery machine cannot create the design.
Why a JPG Image Cannot Be Used Directly
Many beginners ask why they cannot simply load a JPG into the machine.
The answer is simple.
Embroidery machines cannot understand pictures.
They only understand stitches.
Before embroidery begins, every design must be converted into a stitch file using embroidery digitizing software and professional skills.
This step is one of the most important parts of the embroidery process.
How Professionals Convert JPG Images into Embroidery Files
Professional digitizing follows several careful steps.
Each one improves the final embroidery.
Step 1: Choose a High-Quality Image
Everything starts with the image.
A clear JPG creates better embroidery.
Look for:
- High resolution
- Sharp edges
- Bright colors
- Simple details
- Clean background
Low-quality pictures often create poor embroidery results.
Step 2: Clean the Artwork
The image is then prepared.
The digitizer removes:
- Extra backgrounds
- Shadows
- Unwanted objects
- Noise
- Small distractions
A clean design is much easier to digitize.
Step 3: Study the Design
Before adding stitches, professionals study the artwork.
They check:
- Shape
- Size
- Colors
- Small details
- Fabric type
Planning helps avoid stitching problems later.
Step 4: Select Stitch Types
Different parts of the design need different stitches.
Satin Stitch
Used for:
- Letters
- Borders
- Small objects
It creates smooth and shiny embroidery.
Fill Stitch
Used for:
- Large shapes
- Backgrounds
- Solid areas
It gives strong coverage.
Running Stitch
Used for:
- Thin lines
- Small details
- Decorative outlines
Each stitch type serves a different purpose.
Step 5: Set Stitch Direction
The direction of stitches changes how embroidery looks.
Good stitch angles create depth and texture.
Wrong stitch angles can make a design look flat or uneven.
Professionals adjust stitch direction throughout the design.
Step 6: Add Underlay
Underlay is the hidden stitching placed beneath the top layer.
It helps:
- Hold the fabric
- Improve stitch quality
- Reduce shifting
- Support large areas
Strong underlay creates stronger embroidery.
Step 7: Balance Stitch Density
Too many stitches can damage fabric.
Too few stitches leave empty spaces.
Professionals find the right balance for every design.
Correct density creates smooth and attractive embroidery.
Step 8: Test the File
Before delivering the design, professionals perform a stitch test.
Testing checks:
- Stitch quality
- Thread flow
- Alignment
- Density
- Overall appearance
Small changes are made until the design stitches perfectly.
Why Professional Digitizing Is Better Than Auto Conversion
Many online tools promise instant embroidery files.
These tools may work for very simple artwork.
They often struggle with detailed designs.
Automatic software cannot fully understand:
- Fabric movement
- Stitch direction
- Pull compensation
- Thread behavior
- Design balance
Professional digitizers make decisions based on experience, not just software.
That creates much better embroidery.
Common Problems with Poor Conversion
A poor embroidery file can create many issues.
Thread Breaks
Bad stitch paths cause frequent thread breaks.
Machines stop often.
Production takes longer.
Fabric Puckering
Heavy stitch density pulls the fabric.
The design looks wrinkled.
Gaps in the Design
Poor planning leaves empty spaces between stitches.
The embroidery looks unfinished.
Uneven Lettering
Small text becomes difficult to read.
Letters may merge together.
Poor Registration
Different parts of the design fail to line up.
The finished embroidery loses its professional appearance.
Most of these problems begin with poor digitizing.
Which JPG Images Work Best?
Some images produce better embroidery than others.
The best choices include:
- Business logos
- Sports logos
- Cartoon artwork
- Simple illustrations
- Name designs
- School emblems
- Pet drawings
Very detailed photos often need to be simplified.
This improves stitch quality.
Different Fabrics Need Different Settings
Fabric affects embroidery more than many people realize.
Professional digitizers adjust files based on the material.
Cotton
Easy to stitch.
Very stable.
Polo Shirts
Stretchy fabric needs careful density.
Hats
Curved surfaces require special stitch planning.
Jackets
Heavy fabrics need stronger support stitches.
Towels
Soft loops require topping and proper underlay.
Every fabric behaves differently.
Good digitizing takes this into account.
Tips for Better Embroidery Results
Use Clear Artwork
High-quality images always produce better embroidery.
Keep Designs Simple
Simple artwork usually stitches cleaner.
Choose the Right Size
Very small designs lose detail.
Large designs take longer to stitch.
Test Before Production
Always stitch one sample before making many copies.
Testing helps catch small problems early.
Work with Skilled Digitizers
Experience makes a big difference.
Professional digitizers know how to solve problems before they appear.
Why Experience Matters
Embroidery digitizing is both technical and creative.
Software provides tools.
Experience provides better results.
Professional digitizers understand:
- Stitch flow
- Fabric behavior
- Thread tension
- Pull compensation
- Machine limits
These skills come from years of practice.
They help create embroidery that looks clean and lasts longer.
Companies like Absolute Digitizing use this experience to prepare embroidery files that stitch smoothly across many different fabrics and machine types.
Choosing the Right Digitizing Service
Not every digitizing company delivers the same quality.
Look for a service that offers:
Skilled Digitizers
Experience improves every design.
Fast Turnaround
Quick delivery keeps projects moving.
Quality Control
Every file should be tested before delivery.
Multiple File Formats
Different embroidery machines use different formats.
A good service supports many of them.
Helpful Customer Support
Friendly support makes the entire process easier.
Reliable companies focus on customer satisfaction from start to finish.
Why Quality Digitizing Saves Money
Many people try to save money by choosing the cheapest option.
Poor digitizing often creates expensive problems later.
Good embroidery files reduce:
- Thread waste
- Fabric damage
- Machine downtime
- Production delays
- Customer complaints
A quality file helps every embroidery project run more smoothly.
That is why many businesses trust Absolute Digitizing when they need dependable embroidery files for important orders.
Frequently Asked Questions
Can every JPG image become an embroidery file?
Most images can be converted, but detailed artwork may need to be simplified for better stitching.
Is embroidery digitizing automatic?
No.
Software helps, but professional experience is needed for the best results.
Why is stitch density important?
Correct density creates smooth embroidery without damaging the fabric.
Can one embroidery file work on every fabric?
Not always.
Different materials often require different settings.
Why should I order a stitch test?
Testing helps find small problems before full production begins.
Final Thoughts
Turning a JPG image into a professional embroidery file is much more than changing one file format. Every stitch must be carefully planned to create clean, smooth, and long-lasting embroidery. Stitch type, stitch direction, underlay, density, and fabric all work together to produce the final result.
When the digitizing process is done correctly, embroidery becomes sharper, stronger, and more attractive. It also helps reduce waste, improve production speed, and protect valuable materials.
Whether you are creating one custom gift or thousands of embroidered products, investing in professional digitizing is always a smart choice. With the right knowledge, careful planning, and trusted experts like Absolute Digitizing, you can create embroidery designs that look professional from the first stitch to the last.

About Premium Author
This post has been authored and published by one of our premium contributors, who are experts in their fields. They bring high-quality, well-researched content that adds significant value to our platform.
Popular Categories
Stay Connected
Recent Posts